Wednesday, 21 October 2009

Image Composition


This is an image that I composed from 2 images. Using a tutorial I picked up several tips to make the image look more realistic. I learned to use the 'Feather' tool so it blends the outline of the object blend more.

I also found out that you can add and deduct from a selection when using the selection tool. This is good when selecting small corners that the lasoo tool cannot.

I also found out that a good way of blurring an image is to select part of the fore/back ground instead of the hole image. Then blur the hole image so different sections are blurred different amounts.

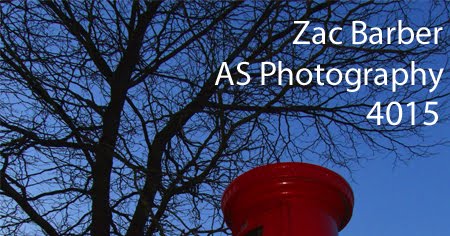
I then tried putting these skills into 2 images of my own:

Wednesday, 14 October 2009

Changing Moods


I first got my original image: one I took in Grosvenor Park a few days ago.
To begin with, I cropped out the fence at the bottom as this was unnecessary.
I then added a warming filter of 44% intensity.


I also change Hue/Saturation/Lightness to +6, +59 and -6.


This is my resulting image.

Friday, 9 October 2009

More Filters

I wanted to experiment further with filters. So I took a picture I have recently taken.
I used the stamp filter and adjusted the levels to make the image look the best it could.
This is my original image:


This is by far my favourite edit so far. I am really pleased with the results and filter can make a good image even better.


Thursday, 8 October 2009

More Filters

This is my original image that I want to add a filter to:


I changed the Brightness to -15 and the contrast to +73.
Then, I used the Invert filter.


For this image I used the Chalk and Charcoal Filter. I then adjusted the settings to:


Charcoal Area: 9 Chalk Area: 9 Stroke Pressure: 1


I used the Dark Strokes filter for this image. I adjusted Balance to 5, Black Intensity to 2 and White Intensity to 4.

Wednesday, 7 October 2009

Filters


Warming 60%


cooling 34%


Red 65%


Green 50%


Violet 40%

David LaChapelle

David LaChapelle is a photographer and director who works in fashion, advertising and art. He was born on the 11th March 1963 and is 46 years old. He attended the North Carolina School of Arts and the School of Visual Arts in New York.

Andy Warhol gave LaChapelle his first professional photography career after meeting in Studio 54.

LaChapelle is renowned for producing vivid ans surreal images of celebrities. He has also directed television adverts for Tommy Hilfiger, Nokia, L'Oreal, Diesel and Burger King.

Some of his most famous photographs contain celebrities such as: Marilyn Manson, David Beckham, Bjork, Mariah Carey, Madonna and many more.

Chapelle's work has been described as: "surrealist, grotesque, shocking and ironic."
Here are some examples:


Digitally Improving one of my own photos


Firstly I took an image that I've taken recently.
I selected the tyres and adjusted the Hue/Saturation and made them pink.


I then cropped the image to cut out un-necessary background.
I then added a cooling photo filter to make the colour more cooling.

Hue, Saturation and Colourise

Hue, saturation, and brightness are aspects of color in the red, green, and blue scheme. These terms are most often used in reference to the color of each pixel.


I used the magnet lasso tool to select the breast and front legs of this picture of a rabbit.
I then used the Hue/Saturation tool and ticked the Colourize box.


Using Levels


I selected an image I wanted to adjust the levels on.
I used the magnet lasso tool to select the sky.
I then adjusted the levels so the sky was more blue.

A histogram is a graph that allows you to judge the brightness of an image. A correctly exposed photograph, the histogram will be mostly central.

This is an example of the histogram of a correctly exposed image.


This is an image that I have adjust the levels on. A high key image is where most of the pixels are white.


A high key image is where most of the pixels are white.
A low key image is where most of the pixels are black.

Saturday, 3 October 2009

Hand-colouring using brush tool


I first found an image that I wanted to colour.
Then I decided what part I wanted to colour and what colour it.
I chose to colour the rims pink, the same as the brake cable, brake lever and grips.


I then made a new layer, used the used the magnet tool to outline the rim, and adjusted Hue/Saturation until I got the colour I wanted.


For the rear wheel I did a similar process. I used the madnet tool to select the area I wanted to colour, then used the paintbrush to colour in the rim

This is the resulting image: